🍣 Maki-Sushi: Rolling Sushi at Home

🍣 Maki-Sushi: Rolling Sushi at Home

Sushi is one of Japan’s most iconic culinary exports. While the word “sushi” may instantly bring to mind rolled seaweed, rice, and colorful fillings, there’s more to sushi than just the rolls.

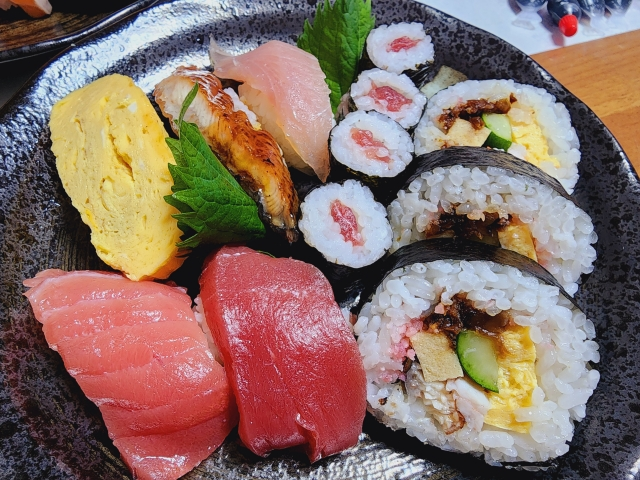
In fact, Japan’s most traditional form of sushi is nigiri-sushi—a simple but elegant topping of raw fish placed on a small bed of hand-formed rice. In contrast, the rolled version, called maki-sushi (巻き寿司), means “rolled sushi,” and is especially popular overseas thanks to its colorful presentation and versatility.

🐟 Sushi Culture and Raw Fish

Raw fish can be intimidating for many people, especially in countries where fresh seafood is harder to access due to food safety concerns. But in Japan, freshness is everything. Sashimi (thinly sliced raw fish without rice) and sushi are treated with the utmost care to ensure safety and flavor.

These days, more and more foreign visitors come to Japan specifically to try authentic sushi, and they’re rarely disappointed. For first-timers, kaiten-zushi (回転寿司)—conveyor belt sushi—is a fun and affordable way to experience a wide range of sushi. These restaurants often provide menus with pictures and English translations, making it easy to explore. Pricing is simple too: the color of the plate tells you the price!


2 types Sushi (left is Nigiri(pieces) and the right is Maki(rolled)) 🧑‍🍳 Rolling Sushi at Home

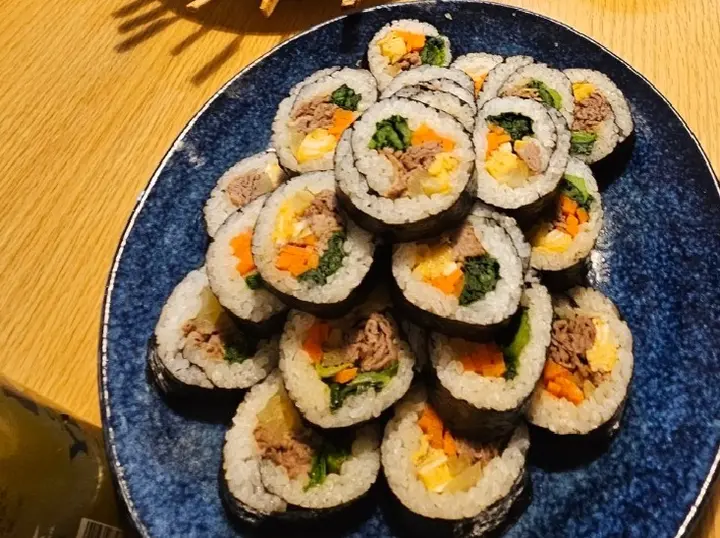
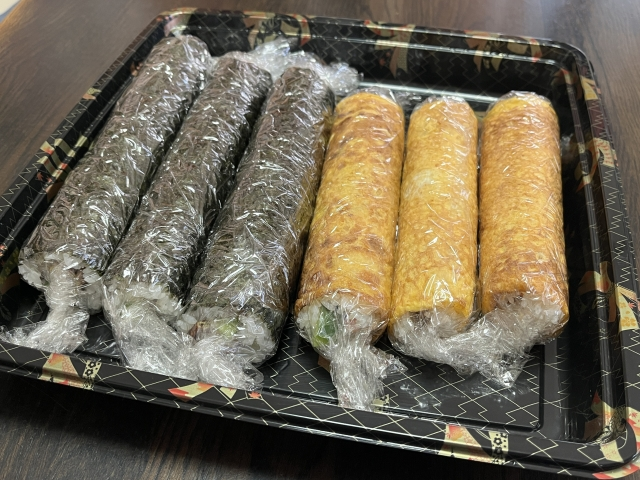
After receiving so many requests from friends abroad who wanted to try sushi, I realized that making maki-sushi at home could be a fun and accessible way to share a bit of Japan—without needing fresh raw fish.

That’s how I started experimenting with vegetarian and meat-based maki-sushi. It’s a great option for anyone living outside of Japan who wants a taste of Japanese cuisine without sourcing raw seafood.

🥢 Ingredients (Makes 2 Rolls) Basic:
  1. 1 cup cooked rice
  2. 2 sheets of nori (seaweed)
  3. 3 tbsp vinegar (preferably rice vinegar)
  4. 3 tbsp sugar
  5. 200g spinach
  6. ½ carrot
  7. 2 eggs
  8. 1 can of tuna
  9. 2 tbsp mayonnaise
Optional Additions:
  1. 200g sliced beef
  2. 1 cucumber
  3. 2 tbsp sesame oil
  4. 2 tsp salt
  5. 100g takuan (yellow pickled radish, also called danmuji in Korean)
🍳 How to Prepare 1. Prepare the Rice

Cook 1 cup of white rice.

In a small bowl, mix vinegar and sugar. Pour it over the cooked rice and gently fold to mix while fanning the rice to cool.

Korean-style Tip: Instead of vinegar and sugar, season the rice with sesame oil and a pinch of salt for a savory twist.

2. Prepare the Fillings
  1. Spinach & Carrots: Boil lightly, julienne, and season with salt, sesame oil, and soy sauce.
  2. Egg Roll (Tamagoyaki): Beat eggs with 2 tbsp sugar and 1 tbsp soy sauce. Cook in a rectangular pan to form a rolled omelet. Aim to match the width of the nori sheet.
  3. Tuna Mayo: Mix drained canned tuna with 2 tbsp mayonnaise.
  4. Optional Beef: Stir-fry beef slices with sugar, soy sauce, and (if available) mirin or sake. Cook until the beef absorbs the sauce and becomes glossy.
🍙 How to Roll Maki-Sushi

1. Place a sheet of nori on top of plastic wrap or a bamboo sushi mat.

2. Spread a thin, even layer of seasoned rice over the nori, leaving a 1 cm gap at the top edge.

3. About 2–3 cm from the bottom edge, layer your fillings horizontally—start with spinach, carrots, tamagoyaki, tuna mayo, and beef if desired.

4. Using your fingers, lift the edge of the mat or plastic wrap and begin rolling the sushi over the fillings. Apply gentle but firm pressure to shape the roll.

5. Once rolled, let the sushi sit wrapped for about 10 minutes to hold its shape.

6. Slice into 3–4 cm pieces using a sharp knife, wiping the blade clean with a damp cloth between cuts for neat slices.


🍽️ Serve and Enjoy!

Arrange your sushi on a plate, serve with soy sauce, pickled ginger, or a dab of wasabi—and say, Meshiagare! (Bon appétit!)

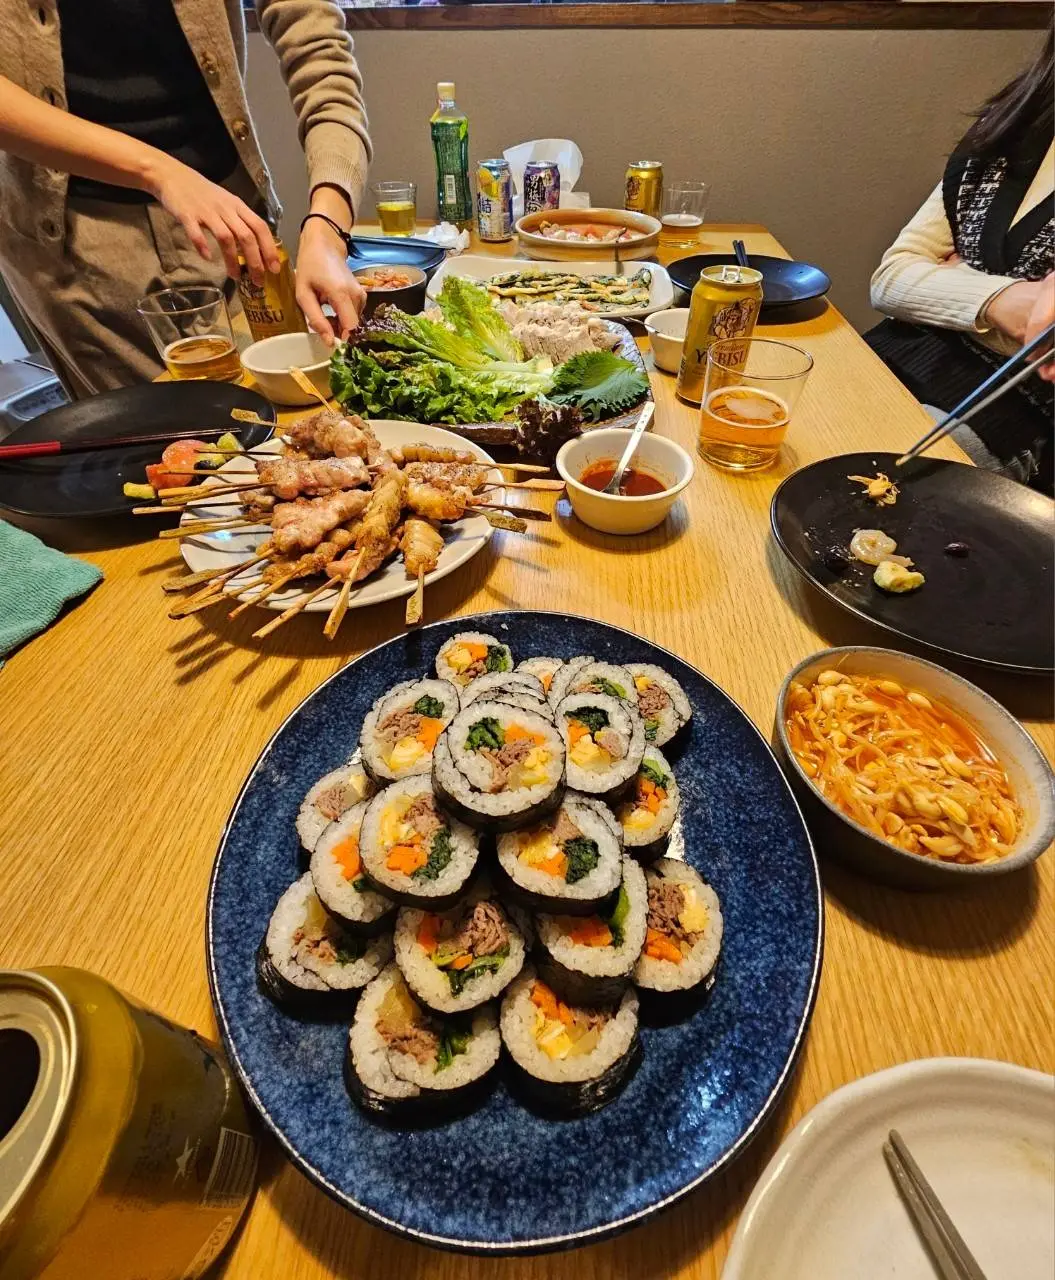
Popular dish in the home party, easy to grab, great combination with Japanese Sake and beer.  🇯🇵 Final Thoughts

Making maki-sushi at home is not only fun but also a delightful way to connect with Japanese culture, wherever you are in the world. Whether you're rolling with vegetables, tuna mayo, or even bulgogi-style beef, each bite brings you closer to Japan’s culinary heart.

So the next time someone says they’ve never tried sushi—invite them over and roll your own. It’s easier than it looks, and it just might become your new favorite home-cooked dish.

...
🍗 Chicken Namban – Japan’s Ultimate Fried Chicken

What’s your favorite Japanese food?

Whenever I ask my international friends, their most common answer is karaage—Japanese-style fried chicken. And honestly, I get it. Karaage is comforting, flavorful, and has that home-cooked nostalgia we all love. But… have you tried its next-level cousin?

Let me introduce you to Chicken Namban (チキン南蛮)—a legendary dish that takes fried chicken to a whole new world of flavor. It’s juicy, tangy, sweet, creamy… and just ridiculously good.

🥢 What Is Chicken Namban?

Chicken Namban originated in Miyazaki Prefecture, located in the southern region of Kyushu, Japan. The word “Namban (南蛮)” historically referred to the Portuguese and Spanish traders who arrived in Japan in the 17th century. Along with goods and Christianity, they brought in new culinary techniques, like deep-frying and marinating food with sweet-and-sour sauces.

That’s where “Namban-zuke” comes from—zuke means "to soak or marinate," so it literally means “Western-style marinade”. This sauce was first used for fish, but eventually someone had the brilliant idea of using it on fried chicken… and the rest is delicious history.

Today, Chicken Namban is loved by people of all ages in Japan—and once you taste it with creamy tartar sauce, you'll understand why. Don't overthink it—just enjoy!

🍽 Ingredients (Serves 2–3)

Main:

  1. Chicken thigh (boneless): 300g
  2. Salt & pepper: to taste
  3. Flour: 50g
  4. Egg: 1
  5. Water: 10ml
  6. Oil for frying

(A) Tartar Sauce:

  1. Boiled egg: 1
  2. Onion (finely chopped): 1/4
  3. Mayonnaise: 3 tbsp (Kewpie recommended!)
  4. Sugar: a pinch
  5. Optional: a dash of vinegar or chopped pickles for extra zing

(B) Namban Sauce:

  1. Soy sauce: 2 tbsp
  2. Sugar: 2 tbsp
  3. Vinegar: 2 tbsp

👩‍🍳 How to Make Chicken Namban

1. Prep the Chicken

Cut the chicken into bite-sized pieces (around 4cm), season with salt and pepper, and let it marinate for 30 minutes.

2. Make the Tartar Sauce

Mix the finely chopped onion and boiled egg. Stir in mayonnaise, a pinch of sugar, and vinegar if desired. I highly recommend using Kewpie mayo for that authentic Japanese flavor.


3. Fry the Chicken

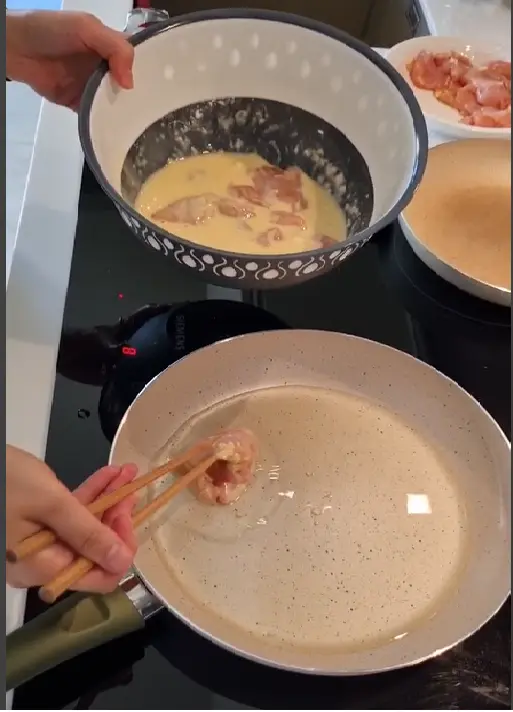
In a bowl, whisk together flour, egg, and water to create a batter. Heat oil to 180°C (350°F). Coat the chicken pieces in the batter and deep-fry until they turn golden brown and crispy.

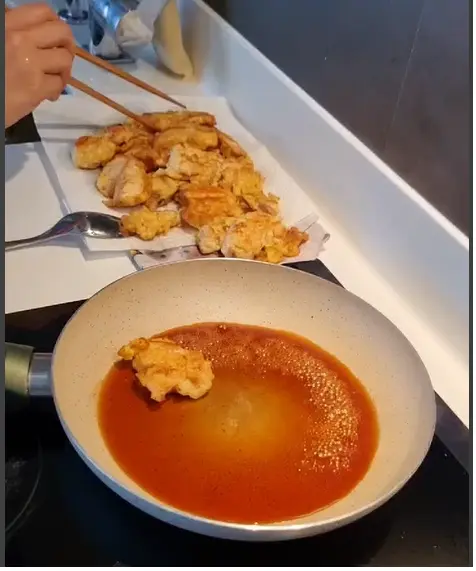
Set aside on paper towels.


4. Prepare the Namban Sauce

In a frying pan, combine soy sauce, sugar, and vinegar. Heat until it starts to bubble and slightly thickens. Add the fried chicken and toss to coat evenly in the sauce.

5. Plate and Serve

Top the chicken with a generous spoonful of tartar sauce. Pair with rice, salad, or just eat it as-is—it’s absolutely satisfying either way.

😋 Final Thoughts

If you're already a fan of karaage, Chicken Namban is going to blow your mind. It’s crispy, juicy, tangy, creamy, and sweet all at once—a flavor bomb in every bite.

Perfect for a cozy dinner or as a surprise dish for friends who love Japanese cuisine.

Meshiagare (Bon Appétit)!

🍮 Japanese Savory Egg Custard – Chawanmushi (茶碗蒸し)

When people think of Japanese food, the first thing that usually comes to mind is sushi—and that’s fair! Sushi is now beloved all over the world, and I always make sure to have it as my first meal when I return to Japan.

But have you ever noticed a warm, delicate side dish that sometimes accompanies your sushi?

That little cup of silky, savory custard is called Chawanmushi (茶碗蒸し)—a traditional Japanese steamed egg pudding. It's soft, umami-rich, and typically served as a small appetizer in Japanese cuisine. “Chawan” means rice bowl, and “mushi” means steamed. So yes—it’s literally “steamed in a rice bowl.”

🌸 My Memory of Chawanmushi

For me, Chawanmushi is more than just a side dish. It’s a cherished family tradition. Every New Year’s Day, my grandmother makes it for the whole family. Her version has just the right balance of salt and sweetness, and the moment I taste it, I know I’m home.

It’s simple but elegant—and a great way to start a Japanese course meal at home for your guests.

🍽 Ingredients (Serves 2)

Egg Custard:

  1. Egg: 1
  2. Dashi soup: 50ml
  3. Salt: a pinch
  4. Sugar: optional, for a mild sweetness

Fillings (feel free to adjust):

  1. Chicken thigh: ~30g (cut into small pieces)
  2. Shiitake or any mushroom: 1
  3. Kamaboko (fish cake): 1–2 slices (optional)
  4. Edamame beans or ginkgo nuts
  5. Carrot (thinly sliced for garnish)
  6. Mitsuba or parsley (for decoration)

👩‍🍳 How to Make Chawanmushi

1. Prepare the Dashi

If you’re using dashi powder, dissolve 1 tsp (about 3–4g) into 50ml of hot water and let it cool.

If you’re using a dashi bag, steep it in 200ml of boiling water for about 4 minutes, then discard the bag and let the broth cool. You’ll use just 50ml for this recipe.

2. Mix the Egg and Dashi

Gently beat the egg and mix in the cooled dashi. Try to avoid creating bubbles—this helps make the custard smooth.

3. Strain the Mixture

Strain the egg-dashi mixture through a fine sieve to get a silky texture. Pour it evenly into two heat-safe cups or bowls.

4. Add the Fillings

Place your chicken, mushroom, kamaboko, and beans into the cups. These will sit under the custard as it steams. You can get creative with the fillings—just don’t overload the cups.

5. Steam

Place a cloth under the lid of your steamer or pot to prevent condensation from dripping onto the custard. Steam over medium-high heat for 5 minutes, then reduce to low and steam for another 10 minutes.

Tip: You can also use a flat pan with a lid and a little water inside to steam if you don’t have a steamer.

6. Garnish and Serve

Top with a slice of carrot and a sprig of mitsuba or parsley. Serve warm.

🥢 Final Thoughts

Chawanmushi is subtle, elegant, and packed with umami. It’s the perfect way to welcome guests or start off a traditional Japanese meal. Soft, savory, and comforting—it might just become your next favorite Japanese dish.

Meshiagare (Enjoy your meal)!